Installing a Git server on FreeNAS
Learn how to install a lightweight Git server on your FreeNAS server. Use the Git server to keep track of changes to important business artifacts and collaborate with others.
Note: I recently moved my Git server to Gitea. To learn how to install Gitea, see Installing a Gitea server on FreeBSD.
A centralized Git server provides multiple benefits, which we explain in the version control system section of our architecture for a self-hosted business guide.
Preparing the jail
The instructions in this post host the app server in a jail on FreeBSD. To learn why we use jails for this purpose, check the Application server section of our self-hosted architecture post.
In this section, you’ll perform the following tasks:
- Create a jail.
- Configure networking on the jail.
- Install the prerequisite packages.
Run the commands from a session in your FreeBSD host.
To create a jail:
- Fetch or update the release version of FreeBSD for jail usage:
iocage fetch --release 11.3-RELEASE - Create a jail named
gitserver:iocage create --name gitserver --release 11.3-RELEASE
To configure networking on the jail:
- Configure the IP address. The following example sets the IP address to
192.168.1.123using a subnet mask of24bits on theem0interface. The command uses the CIDR notation.iocage set ip4_addr="em0|192.168.1.123/24" gitserver - Configure the default router. The following example sets the default router
to
192.168.1.1:iocage set defaultrouter=192.168.1.1 gitserver
Start the jail and open a session to complete the rest of the tasks in this section:
iocage start gitserver
iocage console gitserver
Install the git package:
pkg update
pkg install --yes git
Finally, configure a user for Git operations:
- Create a new
gituser:pw useradd -n git -d /git - Transfer ownership of the
/gitfolder, which includes the folder that stores the repositories, to thegituser:chown -R git /git - Prompt for a new password for the
gituser:passwd git
(Optional) Storing the repositories on a ZFS dataset
You can store the repositories in a specific ZFS dataset on your FreeNAS server. To learn about the benefits, check the Application server section of our self-hosted architecture post.
To store the repos in a dataset, run the following commands in a FreeNAS
shell or an SSH session on the FreeNAS server. Make
sure that you’re not in the jail session from the previous section. If you are
in the jail session, use the exit command to go to the FreeNAS shell.
- Create a dataset named
reposin thetankpool:zfs create tank/repos - Use the following command to stop the jail:
iocage stop gitserver - Mount the
reposdataset on thereposfolder created in the previous section:iocage fstab gitserver --add /mnt/tank/repos /git/repos nullfs rw 0 0
Configuring the SSH service
Git clients use an SSH connection to communicate with the server. This section shows how to configure the SSH service to accept connections from clients.
On your client computer, verify that you have a certificate that you can use to communicate with the server, or create a new one:
- Check your existing SSH keys:
ls -la ~/.sshUsually, you can use the key stored in the
id_rsa.pubfile. If the previous command lists theid_rsa.pubfile go to step three. Otherwise continue to step two. - Generate an SSH key. Replace [email protected] with your email address.
ssh-keygen -t rsa -b 4096 -C "[email protected]"The previous command prompts for the location to which to save the key. Accept the default value of
id_rsa. - Copy the SSH public key as an authorized key:
ssh-copy-id -i ~/.ssh/id_rsa.pub git@gitserver
To configure the SSH service on the jail, run the following commands in a session on the FreeNAS server:
- If you’re not already in a session on the jail, open one:
iocage console gitserver - Configure the SSH service to start on boot:
sysrc sshd_enable="yes" - Start (or restart) the SSH service:
service sshd onerestart
To validate the configuration, connect to the Git server by running the following ssh command from your client computer:
ssh git@gitserver
Verify that you can connect to the server without using a password.
Testing the Git server
To test the Git server, create an empty repository that clients can use to push commits:
- Open an SSH session to the server:
ssh git@gitserver - Create a new
my-repo.gitfolder in/git/repos/:mkdir /git/repos/my-repo.git cd /git/repos/my-repo.gitThe
.gitextension is a convention for the bare repository used in the next step. The extension is not strictly required, but recommended. - Initialize the repository as a bare repository. A bare repository doesn’t
contain a working directory which is not required in the server because files
are not edited directly.
git init --bare
On the client computer, create a repository and push a commit to the server:
- Create and initialize a repository:
mkdir my-repo cd my-repo git init - Add a test file and commit the changes to the repository:
echo "A test file" >> test-file git add test-file git commit -m "A test commit" - Register the remote repository, which is hosted on the Git server:
git remote add origin git@gitserver:repos/my-repo.git - Push the new commit to the Git server:
git push origin masterThe previous command pushes the commit to the server.
You can clone, pull, and push additional commits from clients that have access to the server.
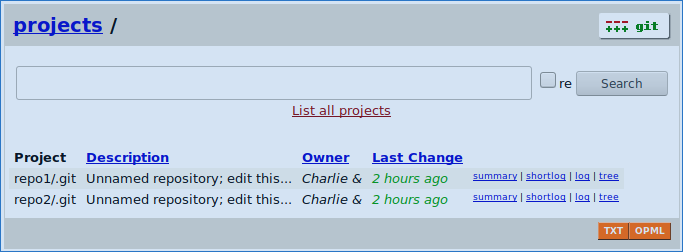
If you want a simple dashboard to browse the repositories, check our post on how to install GitWeb on FreeNAS. The following screenshot shows the GitWeb interface: