Installing a Nextcloud server on FreeNAS
Learn how to install a Nextcloud server on FreeNAS. Configure ZFS datasets to store the files of your users.
Use the values in this guide as an example to tune your system. You might need to do some research to find your optimal configuration.
Prerequisites
- A MariaDB server, which can be the same as your Nextcloud server or a separate host.
- To configure access over HTTPS, you need an SSL certificate, such as the ones provided by Let’s Encrypt.
Creating ZFS datasets
You can store the files that users upload to Nextcloud in a specific ZFS dataset on your FreeNAS server, which can make it easier to perform some administrative tasks, such as backups.
To create the dataset, run the following command in a FreeNAS shell:
zfs create tank/files
The previous command creates a dataset named files in the tank pool.
Preparing the jail
The instructions in this post host the app server in a jail on FreeBSD. To learn why we use jails for this purpose, check the Application server section of our self-hosted architecture post.
In this section, you’ll perform the following tasks:
- Create a jail.
- Configure networking on the jail.
- Install the prerequisite packages.
Run the commands from a session in your FreeBSD host.
To create a jail:
- Fetch or update the release version of FreeBSD for jail usage:
iocage fetch --release 11.3-RELEASE - Create a jail named
nextcloud:iocage create --name nextcloud --release 11.3-RELEASE
To configure networking on the jail:
- Configure the IP address. The following example sets the IP address to
192.168.1.123using a subnet mask of24bits on theem0interface. The command uses the CIDR notation.iocage set ip4_addr="em0|192.168.1.123/24" nextcloud - Configure the default router. The following example sets the default router
to
192.168.1.1:iocage set defaultrouter=192.168.1.1 nextcloud
Start the jail and open a session to complete the rest of the tasks in this section:
iocage start nextcloud
iocage console nextcloud
Install the following packages:
- apache24
- nextcloud-php73
- php73-pecl-imagick
pkg update
pkg install --yes apache24 nextcloud-php73 php73-pecl-imagick
Create the folder in the jail where you are going to mount the dataset. Assign
the www user as the owner:
mkdir -p /usr/local/www/files
chown -R www:www /usr/local/www/files
chown -R www:www /usr/local/www/nextcloud
Close the session in the jail so you can mount the datasets from your FreeNAS session:
exit
Mount the datasets on the jail:
- Use the following command to stop the jail:
iocage stop nextcloud - Mount the
filesdataset on the folder created in the previous section:iocage fstab nextcloud --add /tank/files /usr/local/www/files nullfs rw 0 0 - Restart the jail:
iocage start nextcloud
Creating the database
Nextcloud requires a database server, you can use MySQL / MariaDB, PostgreSQL, or Oracle. This guide uses a MariaDB server to host the Nextcloud database. For information on how to install a MariaDB server, check Installing a MariaDB server on FreeNAS.
Once you have the MariaDB server installed, create a user and database:
- Open a session on your MariaDB server:
iocage console mariadb-server - Once in the MariaDB server, open a connection to the database engine:
mysql -u root -p - Create a database user named
nextcloud. Make sure to replacelocalhostwith the hostname of the Nextcloud server anddb-user-passwordwith a strong password:CREATE USER 'nextcloud'@'localhost' IDENTIFIED BY 'db-user-password';If your MariaDB server is configured with access over TLS you can append
REQUIRE SSLto the previous command to make sure that the communication between the servers is encrypted. - Create the database:
CREATE DATABASE nextcloud; - Grant permissions on the database to the nextcloud user:
GRANT ALL ON nextcloud.* TO 'nextcloud'@'localhost';
FLUSH PRIVILEGES;
Make sure to replace
localhostwith the hostname of the Nextcloud server. - Close the database connection:
exit
Configure the service
Open a session on the nextcloud jail:
iocage console nextcloud
- Copy the
php.ini-productionexample file to thephp.inifile:cp /usr/local/etc/php.ini-production /usr/local/etc/php.iniUpdate the
date.timezonesetting in the php.ini file to an appropriate value from the List of supported timezones. - Copy the
ca,crt, andkeyfiles of your certificate to a folder in the jail. - By default, any
.conffile in theIncludesfolder is added to the Apache configuration. Create the/usr/local/etc/apache24/Includes/my-conf.confwith the following contents:LoadModule proxy_module libexec/apache24/mod_proxy.so LoadModule proxy_fcgi_module libexec/apache24/mod_proxy_fcgi.so LoadModule rewrite_module libexec/apache24/mod_rewrite.so LoadModule socache_shmcb_module libexec/apache24/mod_socache_shmcb.so LoadModule ssl_module libexec/apache24/mod_ssl.so DocumentRoot "/usr/local/www/nextcloud" <Directory "/usr/local/www/nextcloud"> Options Indexes FollowSymLinks AllowOverride all Require all granted </Directory> Listen 443 <VirtualHost *:80> ServerName nextcloud.example.org Redirect permanent / https://nextcloud.example.org/ </VirtualHost> <VirtualHost *:443> DirectoryIndex index.php DocumentRoot "/usr/local/www/nextcloud" Protocols h2 http/1.1 ServerName nextcloud.example.org:443 SSLEngine on SSLCertificateFile /path/to/certificate.crt SSLCertificateKeyFile /path/to/certificate.key SSLCertificateChainFile /path/to/certificate.ca <FilesMatch "\.php$"> SetHandler "proxy:fcgi://127.0.0.1:9000/" </FilesMatch> <IfModule mod_headers.c> Header always set Strict-Transport-Security "max-age=15552000; includeSubDomains" </IfModule> </VirtualHost> - Add environment variables for php-fpm by uncommenting the following lines in
the
/usr/local/etc/php-fpm.d/www.conffile:env[HOSTNAME] = $HOST env[HOST] = $HOST env[PATH] = /usr/local/bin:/usr/bin:/bin env[TMP] = /tmp env[TMPDIR] = /tmp env[TEMP] = /tmpVerify that you’re using the right variable for the
HOSTNAMEentry. In our environment, theHOSTNAMEvariable doesn’t exist by default. For this reason, we assigned theHOSTNAMEvariable in the file to theHOSTenvironment variable. - Configure the web service startup and restart the web server:
sysrc apache24_enable=yes
sysrc php_fpm_enable=yes
service php-fpm onestart
service apache24 onestart
Run the installation wizard
This is a good time to run the installation wizard since you already configured access over HTTPS. Running the installation wizard includes providing a password for an admin account, which is transmitted over the network.
To run the wizard, open a browser and go to your server’s URL, for example
https://nextcloud.example.org. The following screenshot shows the installation
wizard:
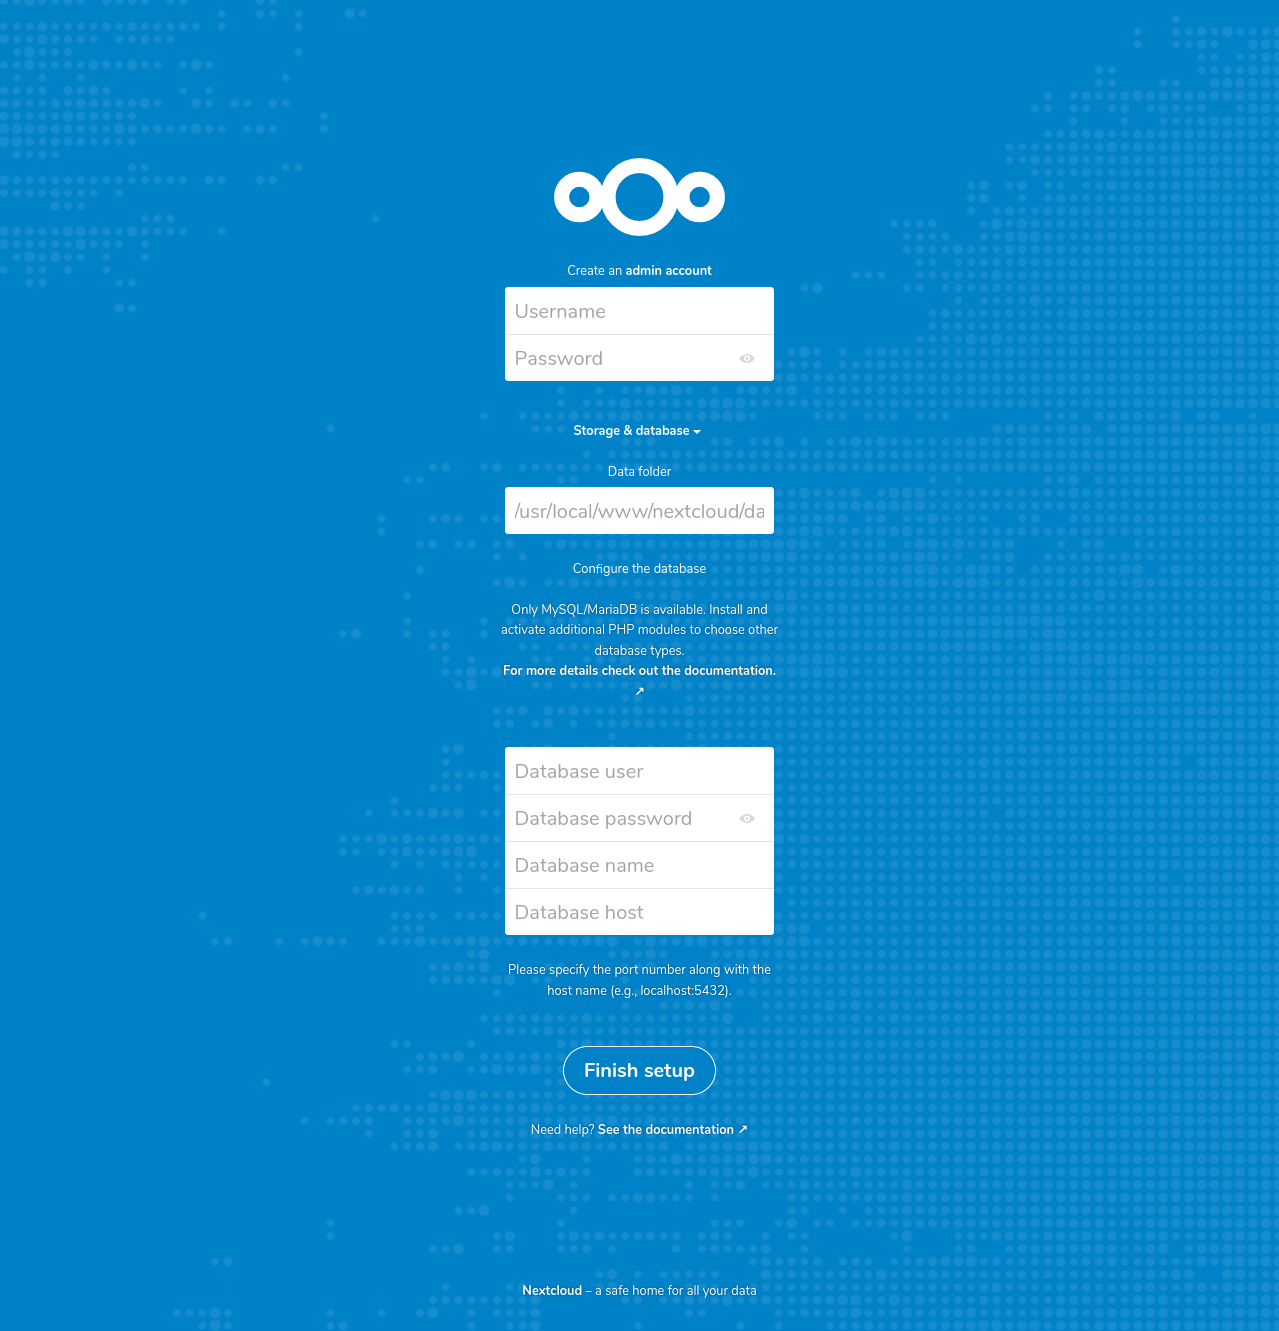
Provide the following information to the wizard and click Finish setup.
- Username: The username of the new admin account
- Password: The password of the new admin account
- Data folder:
/usr/local/www/files - Database user:
nextcloud - Database password:
db-user-password - Database name:
nextcloud - Database host: The MariaDB server, including the port. For example:
localhost:3306.
After a few seconds, your browser displays the welcome screen.
At this time, you should go to Settings > Administration > Overview to update Nextcloud to the latest version. You might see some warnings about further configuration of your server. We cover some of them in the following section.
Further improvements
In this section, we show how to implement some of the improvements described in the Hardening and security guidance and Server tuning sections of the Nextcloud documentation.
Increase PHP memory limit
You might see the following warning in the Settings > Administration > Overview page of your server:
The PHP memory limit is below the recommended value of 512MB.
To increase the memory limit:
- Update the following line in the
/usr/local/etc/php.inifile:memory_limit = 512M - Restart the php-fpm service:
service php-fpm restart
After restarting the php-fpm service, the message should disappear from the Overview page.
Increase maximum upload size
To increase the maximum upload size:
- Update the following lines in the
/usr/local/etc/php.inifile:post_max_size = 2G upload_max_filesize = 2G - Restart the php-fpm service:
service php-fpm restart
Give PHP read access to /dev/urandom
Nextcloud uses urandom along with other sources to generate random numbers. To provide access to urandom:
- Update the following line in the
/usr/local/etc/php.inifile:open_basedir = /dev/urandom:/usr/local/www/nextcloud/:/usr/local/www/files/:/var/log/nextcloud/:/tmp/ - Restart the php-fpm and web service:
service php-fpm restart
service apache24 restart
Tune PHP-FPM
Per Nextcloud’s documentation:
Each simultaneous request of an element is handled by a separate PHP-FPM process. So even on a small installation you should allow more processes to run.
- To tune php-fpm, update the following settings in
/usr/local/etc/php-fpm.d/www.conf:pm = dynamic pm.max_children = 120 pm.start_servers = 12 pm.min_spare_servers = 6 pm.max_spare_servers = 18 - Restart the php-fpm and web service:
service php-fpm restart
service apache24 restart
Use the values in the previous example as a starting point to tune your system.
Enable PHP OPcache
The OPcache improves the performance of PHP applications by caching precompiled bytecode. To enable the OPcache:
- Update the following settings in
/usr/local/etc/php.ini:opcache.enable=1 opcache.interned_strings_buffer=8 opcache.max_accelerated_files=10000 opcache.memory_consumption=128 opcache.save_comments=1 opcache.revalidate_freq=1 - Restart the php-fpm and web service:
service php-fpm restart
service apache24 restart
Using cron to perform background jobs
Nextcloud requires to run background jobs on a regular basis. The jobs can run using AJAX, Webcron, or cron. The recommended method is cron. To configure cron to run the background jobs:
- Run the following command to edit the cron jobs for the www user:
crontab -u www -e - In the editor, enter the following line:
*/5 * * * * /usr/local/bin/php -f /var/www/nextcloud/cron.php
Upgrade Nextcloud from the command line
The web-based updater might fail if you have enough data to make the upgrade operations time out. For example, the Create Backup operation fails with a gateway timeout message.
If you’re running into timeout issues when upgrading your Nextcloud installation, you can try upgrading from the command line:
- Install PHP Phar to be able to run the command line updater:
pkg install php73-phar - Run the command line updater:
su -m www -c 'php /usr/local/www/nextcloud/updater/updater.phar'The updater can turns maintenance mode on at the beginning of the process and asks you if you want to leave it on at the end. Keep maintenance mode on to run other manual steps.
- Some operations—such as adding missing indices—are not executed during the
normal upgrade process. For more information, see
Manual steps during upgrade. To add missing indices:
su -m www -c 'php /usr/local/www/nextcloud/occ db:add-missing-indices' - Disable maintenance mode:
su -m www -c 'php /usr/local/www/nextcloud/occ maintenance:mode --off'